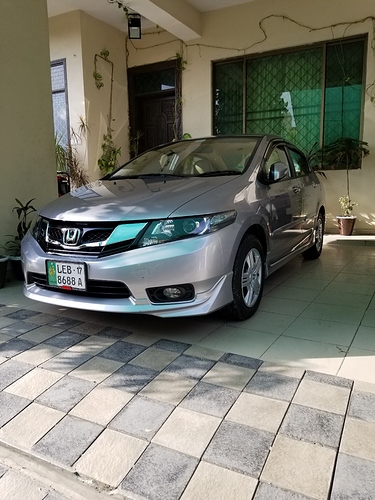
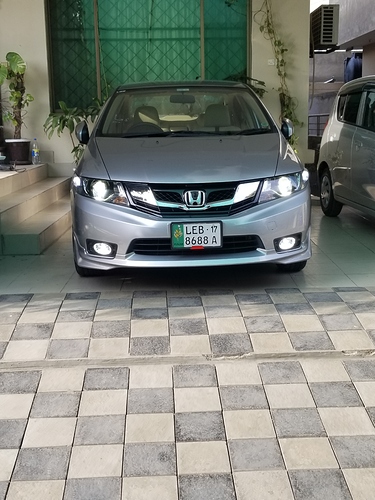
Hey Pakwheelers!
This is my second Honda City. i made a thread on my last Honda City 1.3 MT where i showcased on how to facelift a Honda City with addition of a Modulo body kit.(2014 pre facelift) here's the link, to the thread i hope it works
This time after purchasing the vehicle i had a number of customizations (mostly OEM) in my mind . These are modifications for us in Pakistan but outside Pakistan this stuff is mostly available. Let's start , I'll try to keep everything short and to the point.
TYRES:
First thing i did was replacing the tyres, i have used almost every popular brand available here locally so i decided to stick to Continental CC5 , size being 195/60/15. It was the closest size which matched the original tyre size recommended by the manufacturer. Variation was just around 1% which was within the acceptable limit.
FOG LAMPS:
Second thing were fog lamps. I had tried every brand in the market from DLAA to Pentair to DEPO so this time i decided to try the original ones from Honda gateway. The best thing about getting fog lamps installed from Honda was that not a single wire was cut, everything was simply plugged in. For lamp Crystal also has more shiny effect to it as compared to local ones.
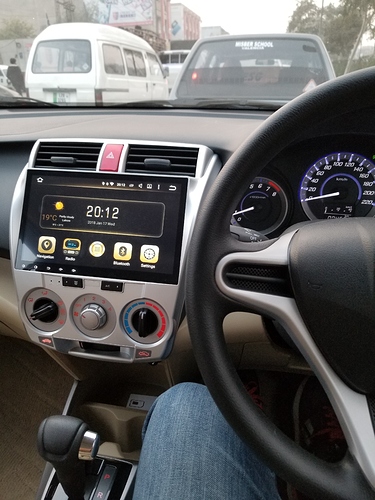
MULTIMEDIA SYSTEM:
Having done that i moved on towards the navigation system . I brought a Chinese 11 inch player with Android 6.0 , it was made by a company known as CUSP. it has a quad core processor with 2gb of RAM and an excellent screen which had good daylight visibility as well. I got both the cameras (front and back) made by tracking world which come with Aspire. During the process none of the original wires were cut or peeled off, everything was grip to grip.
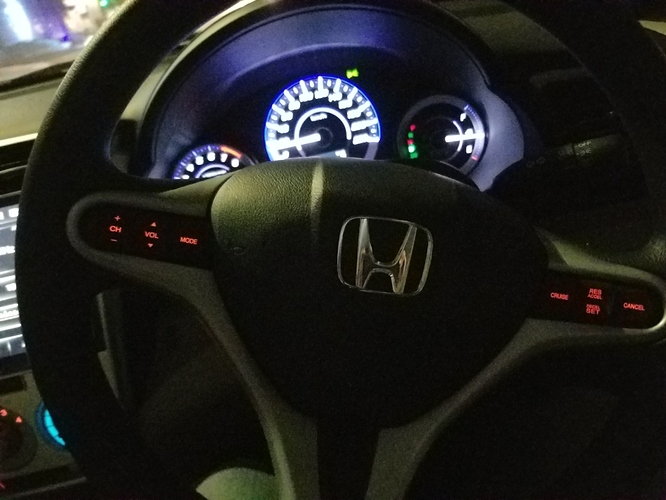
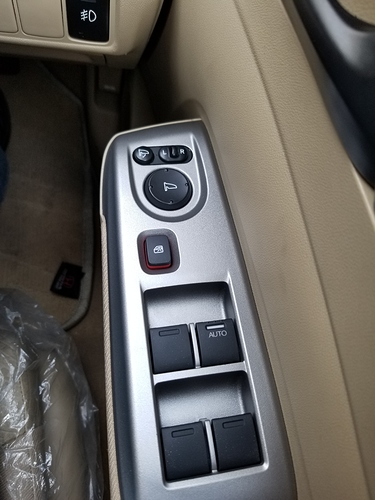
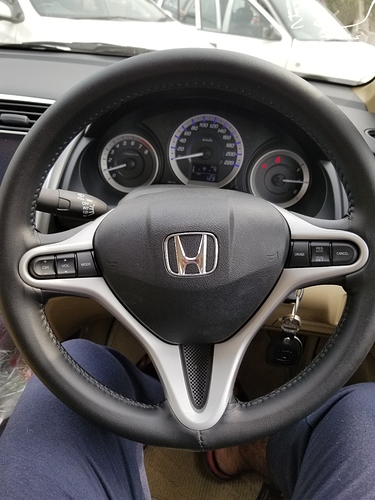
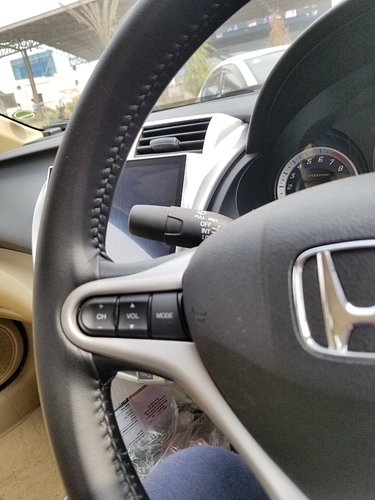
STEERING CONTROLS & RETRACTABLE MIRRORS:
Well, with the big screen it was getting difficult to operate it while driving which prompted me to think about getting multimedia steering controls. I went to Bilal ganj and found a complete steering wheel taken off from a Thai spec Honda City. It had cruise and volume buttons with complete wiring. I knew an electrician their (shakeel) who is very experienced with this stuff who also guided me to install retractrable side mirrors. I got compete mirrors as well taken off from two separate doors.
Retraction needed new wiring from left to right and a new switch with retracting option . I got a Japanese wire with an original and a very clean switch as well after alot of searching.
Multimedia controls also needed a wire plus a new clock spring for the passage of wires. All original stuff was sourced their and then and work started after that. It took me 3-4 hours for the complete process
All work was done very professionally and once again no original wires were cut or peeled off in the process. New connections were made yet again. The multimedia buttons were just linked with the navigation system which had the option to work with steering buttons. Cruise control buttons were their to compete the look as i couldn't source enough information and parts to help me activate cruise control in my car. The project was therefore postponed for future.
All work was done delicately and at the end of the day it was money and time well spent. Multimedia buttons were an absolute hit for me and retractable mirrors also came in very handy at closed space Lahore driving.
AIR VISORS:
I ordered almost transparent 'Air visors' from AliExpress which costed me 6k pkr. 1st thing,they were expensive and second thing GPO detained them so i had to give 1k to get them released. The biggest drama unveiled when i ooened the visor box; they were the same black colour visors available here locally in 1500-200 k range. I cursed myself for ordering them online, never again!
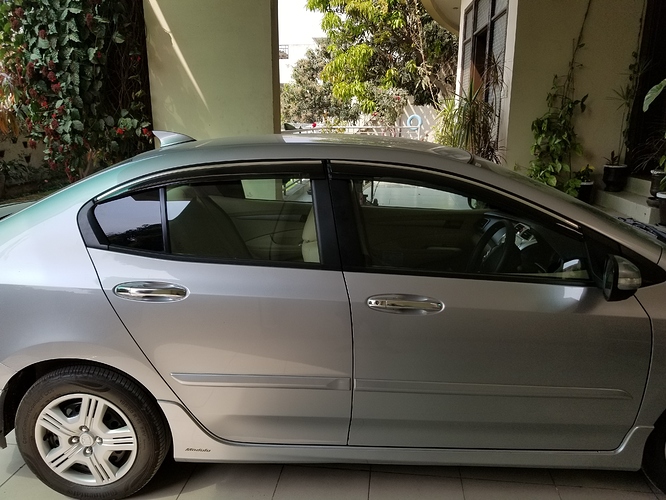
ALLOY RIMS:
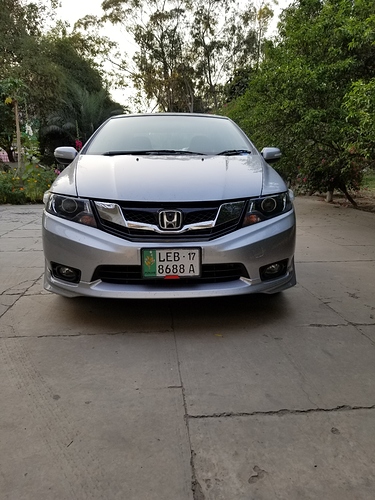
I always wanted originality with my cars looks and for that i was looking for OEM stuff which was only possible with original rims. At first i decided to go for 16 inch genuine Honda rims which come in the Thai spec Honda City2012 or the ones which come in Honda fit ( black n silver 4 nut) . Both of these options weren't deemed feasible since i had to scrap my new tyres for 16 inch rims. Plus, it wouldve been a pain to search for 185/55/16 tyres in the market. All this made b me search for 15 inch rims and Alhamdulillah i found genuine honda city rims (2017 onwards) which come in the base 1.5 V and V plus variant in Thailand.
SEAT COVERS:
I decided to stick with commercially available leatherite which is cheap and easy to maintain. Covers are inspired by Honda Civic black stripes on the front seats only. I selected beige as it looked decent to me.
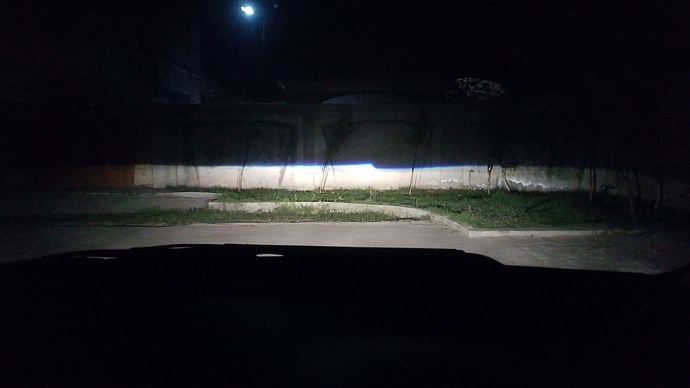
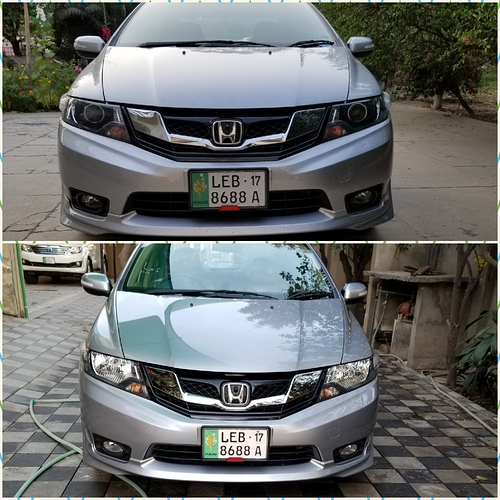
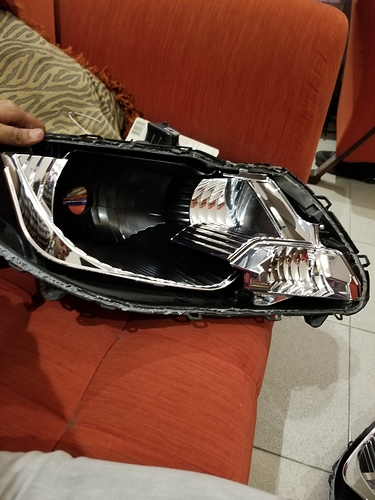
BI XENON RETROFIT:
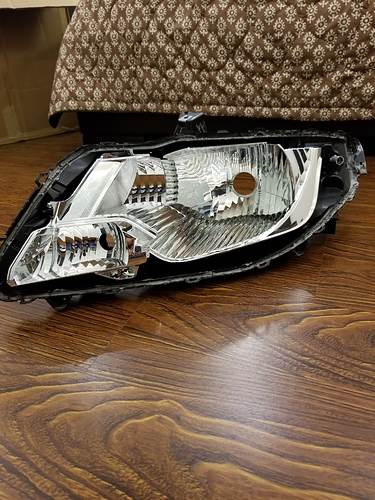
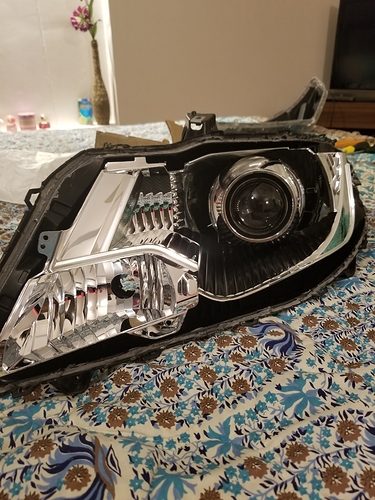
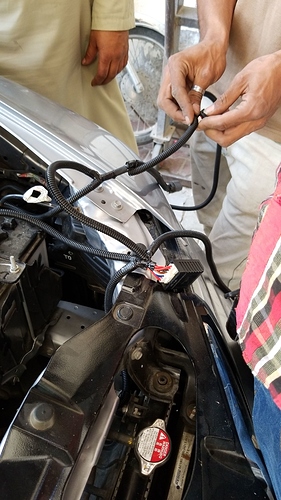
Next thing which was a definite PIA were the cars lights. I always planned on getting a bi xenon retrofit with quality products and no one else but @KeiWorks12 (Ibad) was the person to contact. He always had good stuff with him and lots of pakwheelers have been helped by him. He really proved to be a gem of a guy by helping me till the end of the project. For the project i first purchased a set of used Stanley headlights from Bilal ganj. After getting them Ibad sent me the magic stuff which included the following items:
Mini D2S 3.0 projectors with shrouds
Yeaky 4500k D2S Bulbs
Mitsubishi OEM 35w Ballasts
CN 360 branded wiring harness with high low option
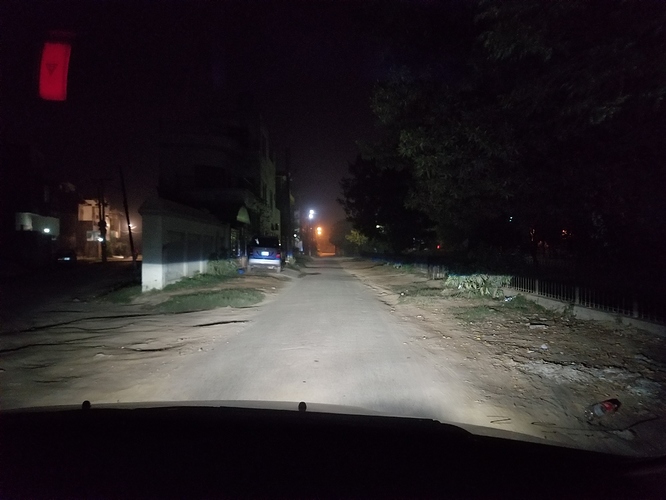
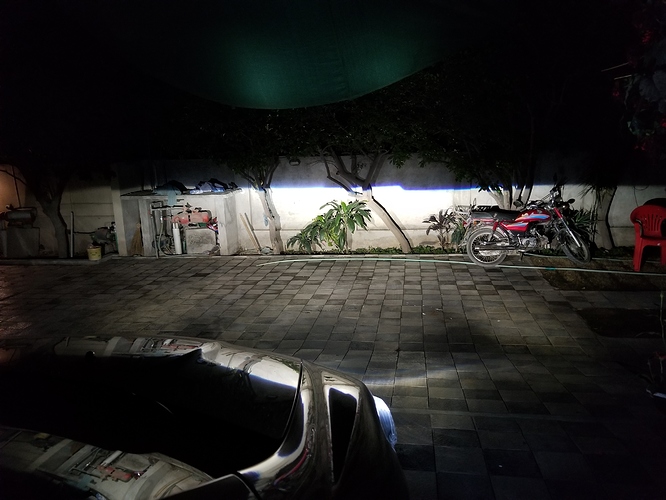
I decided to stick with 4500k for visibility and original looks.
Ibad helped me from the scratch since i had no idea about doing the project myself. He helped me open the headlights which i did by putting them in a carton with a hole for hair dryer insertion. The hair dryer made the box hot which helped me open the original sealant which was a really tough job. After thinking allot i decided to paint the middle area with matt black paint to give the light an aggressive look. Sides and shrouds were left in chrome to retain some chrome look inside the light. End result was very decent which was a combination of chrome and smoked appearance. Wiring was the next part which was one again explained beautifully by ibad on a video call which turned me into a pro (jk) . After installing the projectors i left them a little loose to help with rotational alignment issues after the complete installation. I got the bumper removed and new lights were fixed . After fixing the lights i took the car to my trusted electrician who helped me connect all the wirings. Here too no original wire was tempered with, just new connections were made and all the new wires were placed inside a black plastic cover just like the OEM one. Connections were secured and every wire was clipped and put aside very carefully. After leaving i came to know that my left projector had gone completey hay wire although i payed special attention to them while tightening the rings. Help was sought once again from the man of the hour who helped me align the Projectors with ease without the need of opening them once again. The result was a beautiful cut off which really made me love the lights.
Fog lamps were also upgraded with CN360 LED bulbs which were a special gift from Ibad for which i am really thankful to him. Lights matched good and visibility was increased hundred percent with no glare to the general traffic.
Future upgrades include;
OSRAM CBI OR PHILLIPS XV 5500K D2S
TPMS
OBD2 speed lock
HUD obd2
Cruise control(long shot i guess)
Cost breakdown:
Steering controls with clock spring: 6k
Retractrable mirrors with switch: 5k( after settling my old switch and mirrors)
I paid 14k difference for new Cc5 tyres for brand new Eurostars
Fog lamps Honda: 9000(approximately)
Raxine( correct the spelling if wrong) was used for leather stitching appearance. Cost: 400pkr
Leatherite beige color with mild stitching on sides: 5000pkr
Navigation unit: 28k
Front camera: 1500pkr
Back camera: 2500pkr
Rear door tracking world OEM speakers: 4k( no alteration was needed to put them in place plus they came with special insulation. Sound is okish which no vocal quality at all.
Used headlights: 6k
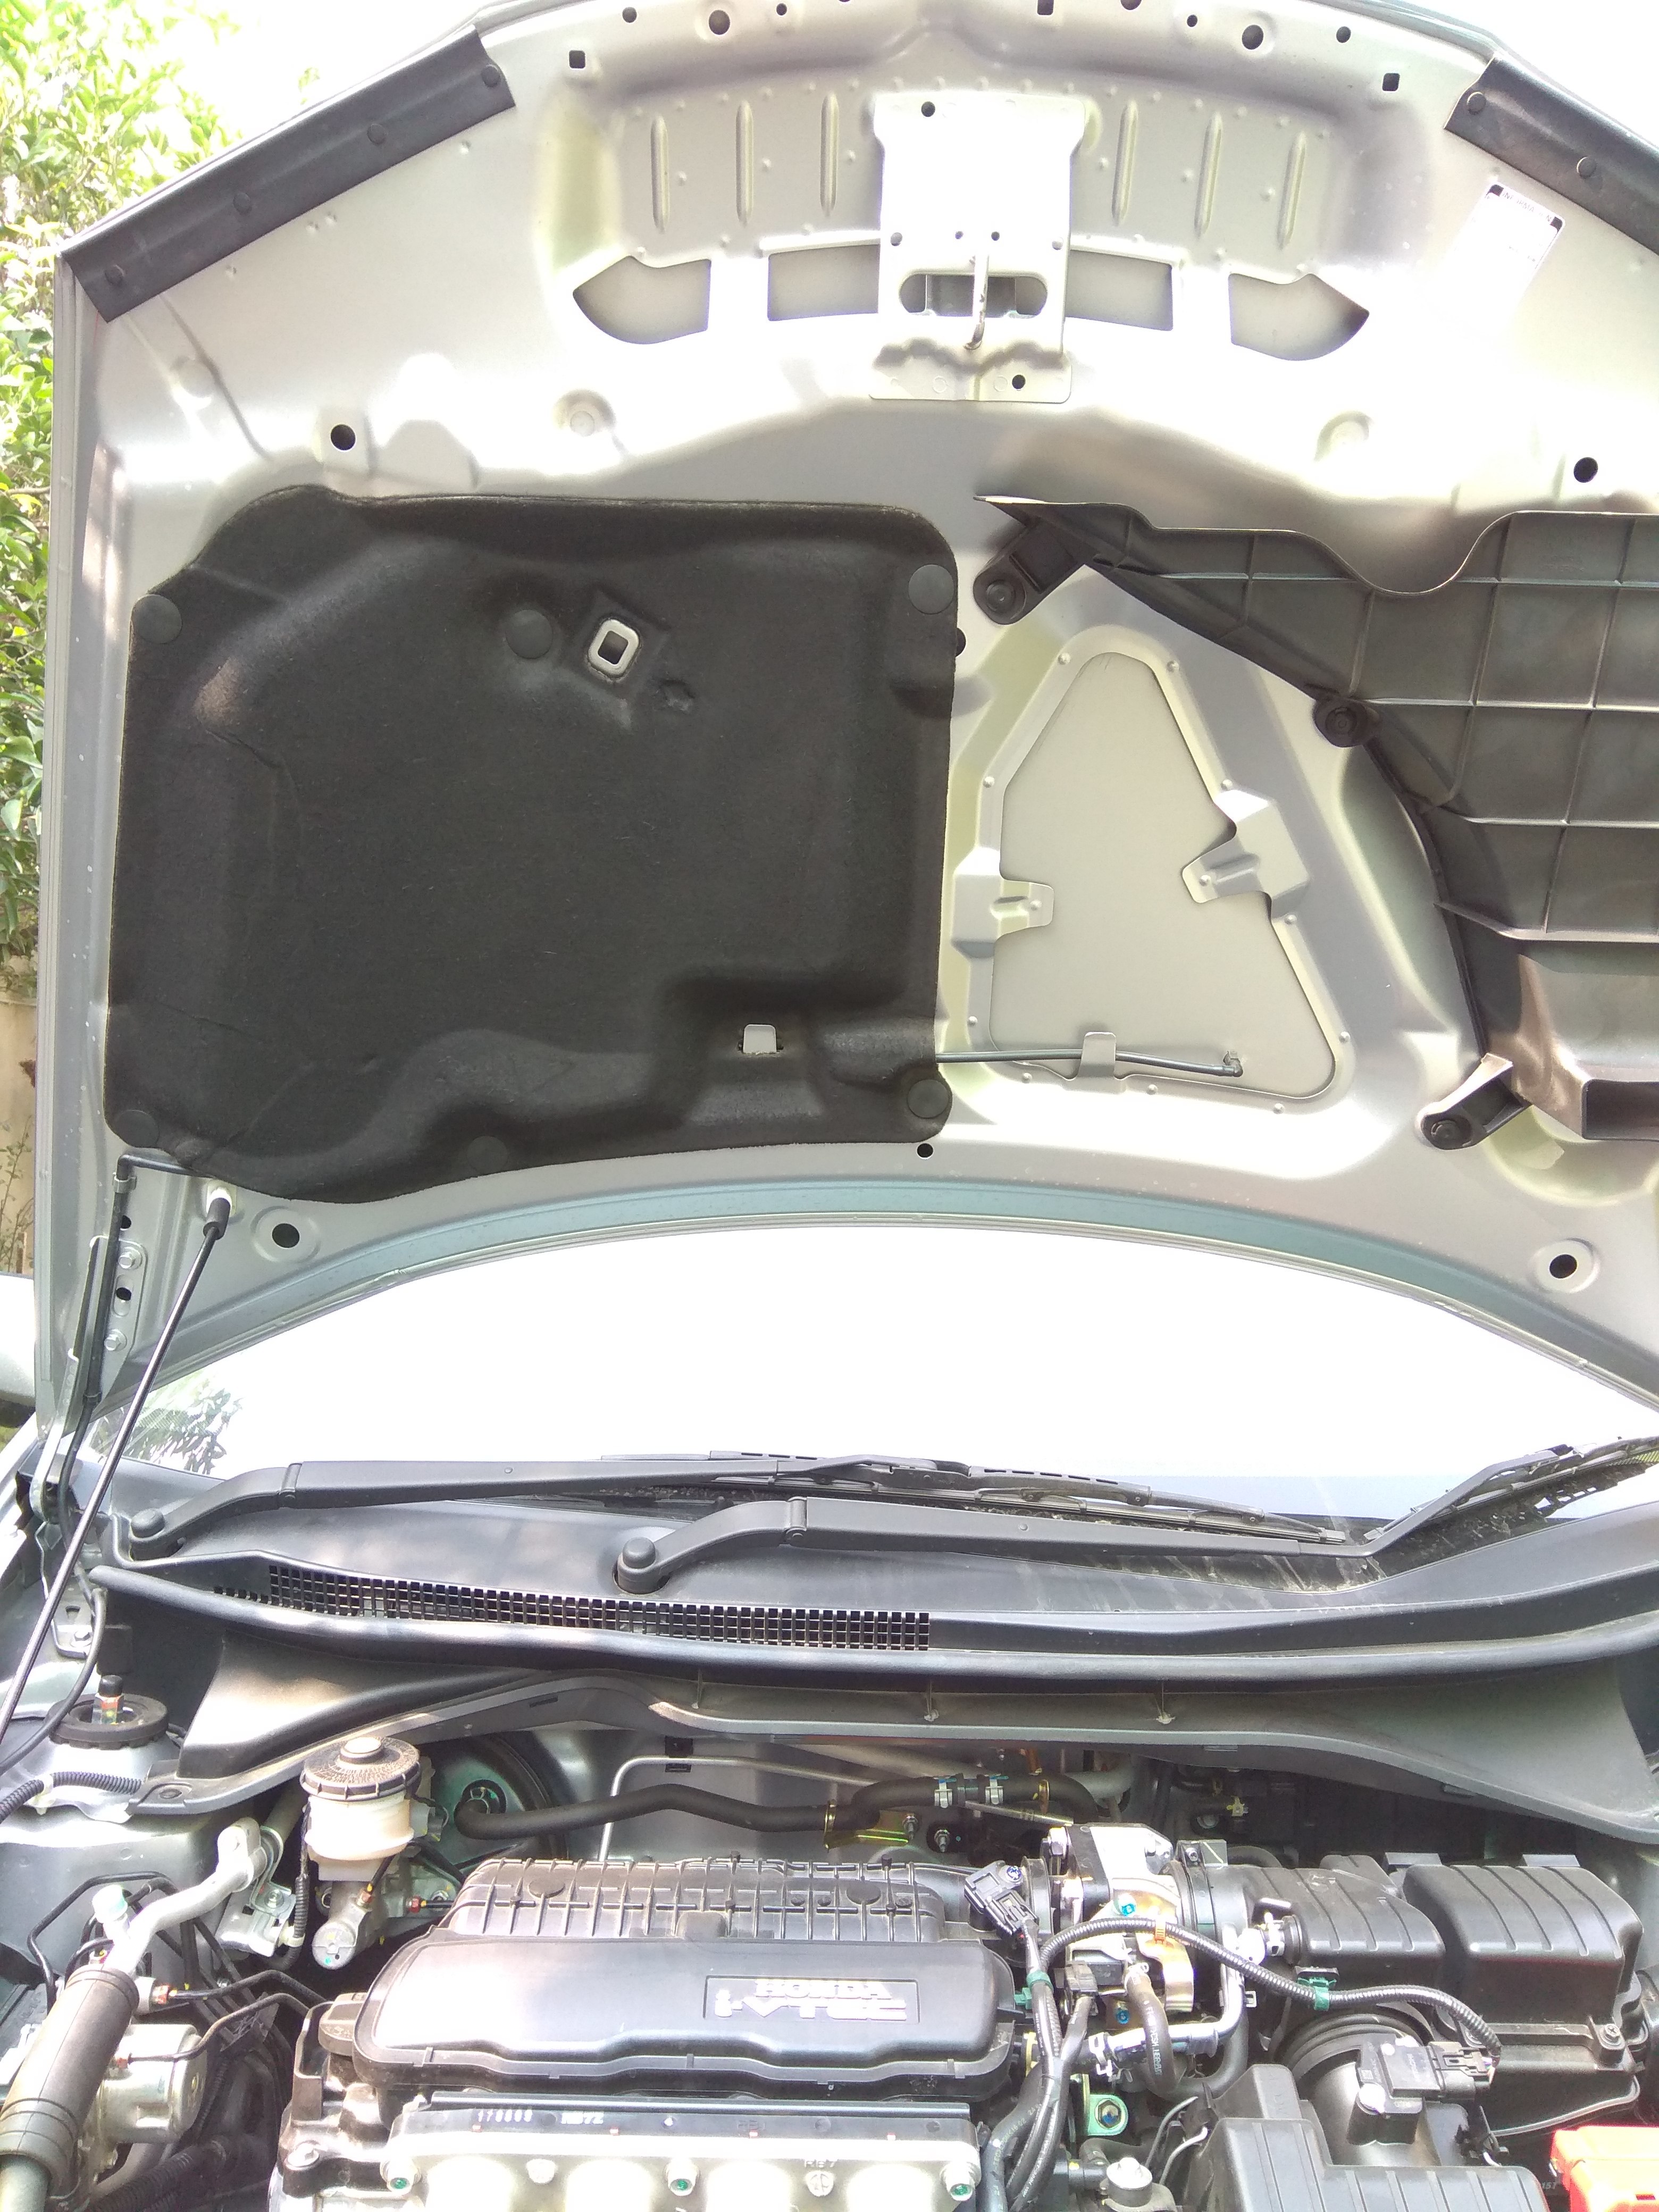
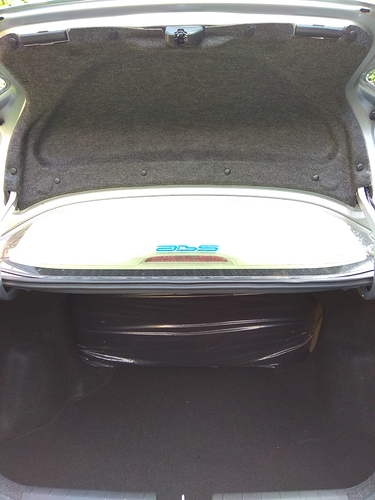
I also got insulation covers for engine and trunk from Bilal ganj. They were taken from an Australian cars trunk and bonnnet alongwith the clips . Cost 2k each.
Honda genuine Diamond cut alloy rims(used)= 34k
At the end i dedicate the lighting project to Ibad as it wasn't possible without his help. Yes, i paid him but the way he helped me was entirely a good will gesture on his part. For cost breakdown of projector retrofit please contact Ibad directly.
Pictures should do the Justice