Salaams.
Now to add components to the Faisal MPPT PCB. But first some explanatory pics.
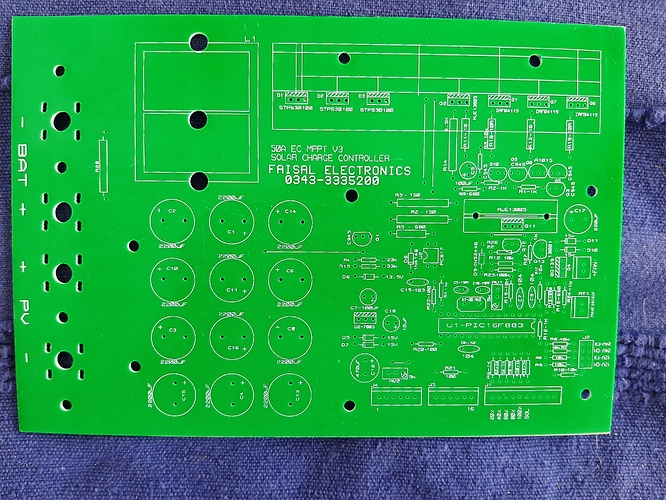
The above is a picture of the PCB used by Faisal. You can see the various components in the picture. Let me now show you the details.
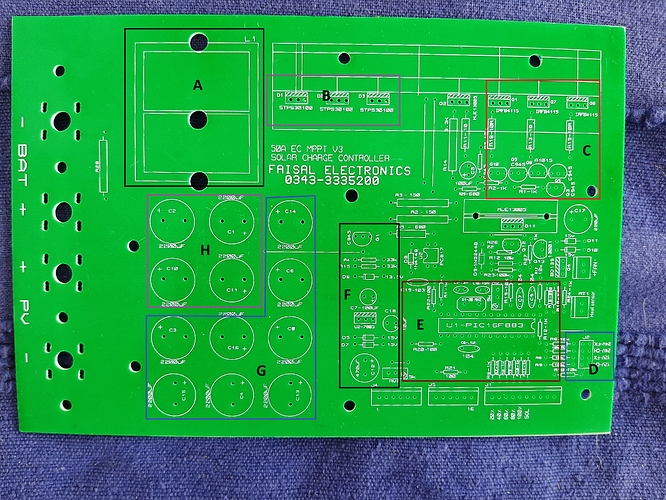
Section marked A is where the MPPT Inductor is to be installed.
B. These are 3 Schottky Diodes in parallel to increase current capacity.
C. Are the 3 x MOSFETs and their associated driving transistors connected thru three resistors.
D.It is the jumper for selection of 12 volt or 24 volt.
E. The PIC16F883 microcontroller which controls the circuit. (I will not be including it. Instead I will use an external ESP8266 wifi enabled microcontroller in PIC’s place).
F. Part of Power Supply circuit. a 7805 regulator for supplying +5 VDC to the microcontroller.
G. The capacitor bank on the Solar side. Very critical and requires good quality capacitors (meaning expensive) to be used.
H. Battery side capacitors. Also require good quality capacitors to be used.
Questions and Answers on the forum or on the YouTube comments section.
Regards